Most groups will skip Illhoof and go to Shade of Aran first because all of the trash except for 1 pull right in front of Illhoof’s room are tied to Shade and they want to make sure the trash is taken care of. Illhoof is actually a very easy fight but a Warlock is basically a necessity.
Encounter Mechanics

Illhoof has a companion, Kil’rek. When Kil’rek dies, Illhoff will take 25% increased damage for about 45 secs and until he respawns. Most groups will have an off tank hold Kil’rek and also build threat on Illhoof (neither hits very hard), a slightly OP’ed tank will be able to tank both.
Illhoof will open 2 portals behind him and imps will come pouring out of them. The best way to deal with the imps is to have a Warlock spamming Seed of Corruption on Illhoof and when it goes off it will kill the imps. The can imps also be dealt with by 2 Mages that have a very specific AOE spec (I’m sorry but I don’t know enough about it to tell you how, but the information is out there on teh intarweb); as I understand it’s very difficult. The imps will aggro onto your trusty Warlock so he will usually need a dedicated healer and if you don’t have a Priest healer I recommend you as the Spriest maintain a Shield on the Warlock.

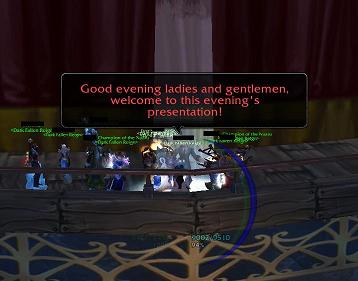
The ranged DPS and healers will also need to stack up on top of the Warlock (and have him stand just outside of melee range of Illhoof on one side of the ring in the center) incase one of them aggros an imp it will still be close enough to kill the imp with the Seed of Corruption. Your Warlock may periodically need some help with the imps, if so a mage throwing a few Arcane Blasts should do the trick. In the picture above we have just pulled so we aren’t all stacked up yet, but where the other SPreist and I are standing is basically where you want to be.
Illhoof will periodically Sacrifice a random raid member (not the tank). They will be put into Demon Chains in the middle of the circle on the floor. The Chains do a lot of damage so all healers need to spam heal the person Sacrificed. All DPS need to take down the Chains as Illhoof will be healed as long as the chains are up. As with the Astral Flares a targeting macro is very useful (with all the imps running around tab-targeting is not a good idea); /target Demon Chain. I like to pan my camera over to look at the circle instead of looking at Illhoof. Deadly Boss Mods will tell you when there is a Sacrifice, but I find the visual clue of someone appearing in the circle very helpful. Demon Chains can be removed by Divine Shield and Iceblock.
It is a good idea to try and kill Kil’rek right after a Sacrifice and then burn Illhoof when he dies so that Illhoof’s increased damage doesn’t get interrupted by the next Sacrifice.
Key Players
As I mentioned a Warlock is almost a necessity. It can be done with a few Mages, but it’s not as effective. Tree Druids do very well MT healing this encounter. Illhoof hits like a girl so rolling Lifeblooms almost take care of the damage. Priest Shield helps the Warlock out a lot with spell pushback.
Since writing this post I have done this fight without a Warlock but I wouldn’t recommend it unless you have heavy DPS to get through the fight quickly. We had a DPS Warrior handle all of the Imps with Sweeping Strikes. It worked but I’m not sure it would without an OP’ed group. However, I encourage you to be creative if you don’t have an optimal make up!
This is actually an easy fight. Once your group gets the hang of it, should be easy purples!
Shadow Priest Specifics
As I’ve mentioned before, if you don’t have a Healpriest you should maintain a shield on the Warlock. Also I do not recommend staying on Illhoof through the Sacrifice to maintain mana-battery-ness. The Chains need to come down fast and every little bit of DPS will help. I don’t bother with anything but Mind Flay, if your group is switching to the Chains on time you’ll do better with Mind Flay instead of waiting to cast Mind Blast.
Holy Priest Specifics
This fight can be mana intensive if your DPS is weak. Be sure to keep your camera looking at the sacrifice circle so you can start healing them quickly. Throw a Renew early on and you’ll probably have to spam Flash Heal. Espcially if a squishy gets Sacrificed he can be dead in the time it takes to cast a Greater Heal. Maintain a Shield on your Warlock or AOE’ing Mages to help with pushback. [Edit: see comments for a great macro from Kirk!]
Priest Loot
- Maleific Girdle
- Cincture of Will
- Mender’s Heart Ring
- Shadowvine Cloak of Infusion
- The Lightning Capacitor (not a very good trinket for a Spriest since we don’t stack crit)
Object of the Encounter
I think the point of this fight is to make sure your raid pays attention. When the sacrifice happens DPS and Healers need to be on the ball to take care of it quickly.
As a side note, I remember a Kara run where a Lock had to go respec in order to take down the Imps effectively. I’m not sure what he had or what he changed to, but if the Imps aren’t going down, that’s something to look into.
SuperCoolPoints
Frank: What’s the first rule when entering a mans car?
Jack: Respect a mans car, a man respects you.
Frank: Rule number two?
Jack: Greet the man. Good afternoon frank!
Frank: Good afternoon Jack.
Jack: Can we play the game now?
Frank: I would think your brain would be too tired after a whole day of school.
Jack: You’re just afraid I’m gonna win.
Frank: I’m afraid you’re gonna be too worn out to do your homework.
Jack: It’s Friday, I don’t *have* any homework.
Frank: In that case: The game. But first, what’s the third rule of the car?
Frank: [Jack buckles his seatbelt] Good.


